LEA NUMBERS®
Near Vision Card
#270900 and #274100
Figure 1. Near vision test with LEA NUMBERS® (#270900) contains a line test on the one side and a test with more tightly crowded numbers on the reverse side of the test card. The distance between the numbers on the crowded side is 50 % of the width of the numbers on the left, 25 % in the middle and 12.5 % on the right of the test.
Near Vision Card #274100 is the same card as the #270900 card but has a 60 cm cord, which makes it useful in measurement of visual acuities at different working distances. Visual acuity values are calculated using the formula #1.
When examining normally sighted children or adults, hold the card #270900 at 40 cm (16 in), the length of the cord. Let the visually impaired children use their preferred distance and head posture during the first testing, later measure at 40 cm (16 in) if the child also uses that distance in visual tasks.
-
Start with binocular testing, using the centre grouping of symbols.
-
Point to each of the four numbers on the top line, observe the baseline responses for comprehension, speed and accuracy.
-
Cover the top line with a white card. Make sure that the card does not cause shadow on the line to be read.
-
Ask the child/adult to identify the first number on the line below the covering card.
-
Repeat this procedure for each or each other line (moving quickly down the chart to avoid tiring the child) until the child/adult hesitates or misidentifies a symbol.
-
Move back up one line and ask the child to identify all the optotypes on that line.
-
If the child identifies at least 3 out of the 5 numbers correctly go to the next lower line and ask the child/person to identify all the numbers on that line.
-
The visual acuity is recorded as the last line on which at least 3 of the 5 optotypes are read correctly. Always test until the threshold line. If the chart is held at 16 inches (40 cm) the visual acuity value is found in the margin adjacent to that line.
-
After binocular testing, proceed with testing each eye separately. In screening, use two pairs of plano glasses for occlusion of the child's eyes or the special screening frame with only one opening in the frame (Figure 2.) It can be used for covering both eyes, one at a time. This is the least disturbing type of occluder. The deep purple frame is most popular.
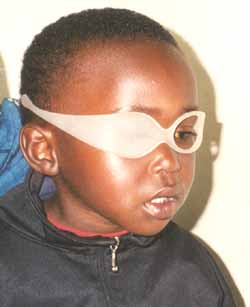
Figure 2. For monocular testing, follow the same procedure as for binocular testing.
-
Older children and adults may be tested using the reverse side of the near vision card where the numbers are spaced more closely, as if in words or sentences. The close spacing of the symbols on this test makes it a sensitive test for detection of increased crowding effect. In children with brain damage there may be great differences between visual acuity values measured with line test and the more crowded tests. Single symbol acuity may be normal or near normal.
-
Visual acuity measured with crowded symbols is closely of the visual acuity values to the smallest text size that the child/person is able to read. It is NOT the size of the texts to be used in learning and at work because nobody likes to read at the level of threshold. We usually read texts that are 3-10 times larger than the threshold size. When it comes to children with reading problems no usual rules work in all cases because the causes of difficulties in reading vary. There are even children with normal visual acuity, better than 1.0 (20/20) who read using video magnifiers, CCTV or even use Braille.
Monocular near vision testing
As a part of vision screening at school age monocular testing is of special interest. If visual acuity at distance has become less than it was before or if there is difference between the two eyes, near vision measurement may reveal that the cause of this change is beginning myopia.
If the near vision values are symmetric and as before or better, the change in distance vision cannot mean anything else but mild myopia. The child does not need to be referred. Reducing the number of unnecessary referrals decreases screening expenses and improves the quality of screening.
By measuring the near vision values one can follow the development of mild myopia until it starts to affect the child's performance in the classroom, reading from the blackboard, maps and other details at distance. This is then the correct time for referral.
If the near vision values are also asymmetric, visual acuity at both distance and near has decreased. In this situation the child needs to be examined by an ophthalmologist to exclude the rare possibility of a non-symptomatic disease. Usually the cause of decrease is a refractive error that may or may not require correction.
Use of near vision testing decreases the number of referrals and at the same time makes screening more sensitive.
Testing Near Vision at Shorter Distances
A child with a visual impairment is allowed to choose any distance and is given a correction for that distance, if needed. If the chart is used at a distance other than the usual 16 inches (40 cm), measure and record the viewing distance and the symbol size read (the M value) or the visual acuity value printed adjacent to the threshold line.
To determine the visual acuity use one of the following formulas:
Note that it is incorrect to report 'V.A. 20/25 at 8 inches' if the child/person could read the 20/25-line (.50M line) at 8 inches. Visual acuity is in that case: 8"/16" x 20/25 = 1/2 x 20/25 = 20/50. (When using the British notation: 6/9 line at 20cm equals: 20cm/40cm x 6/9 = 1/2 x 6/9 = 6/18. When using the decimal notation, the 0.8 line at 20cm equals: 20cm/40cm x 0.8 = 1/2 x 0.8 = 0.4.)
When the distance is one half (or one third) of the standard distance, also the visual acuity value is one half (one third) of the value printed next to that line.
[ Instructions I Paediatric Vision Tests I Vision Tests ]
This document was last modified on